Quick Chicken and Rice Delight
Looking for a comforting meal? My Quick Chicken and Rice Delight in 30 Minutes combines tender chicken, fluffy rice, and vibrant veggies—perfect for busy nights!

- Welcome to the World of Quick Chicken and Rice Delight!
- A Little History on the Dish
- What's Cooking?
- Why You’ll Love This Recipe
- Optional Dish Enhancements
- Your Go-To Essential Ingredients Guide
- Professional Cooking Method: Making Comfort Food with Confidence
- Pro Tips & Secrets
- Perfect Presentation
- Storage & Make-Ahead
- Creative Variations
- Complete Nutrition Guide
- Expert FAQ Solutions
- Recipe Card
Welcome to the World of Quick Chicken and Rice Delight!
Oh boy, let me tell you about my latest kitchen adventure with quick chicken and rice delight in 30 minutes .
So, there i was, a busy evening, kids whining about being hungry, and i was ready to throw in the towel.
But hey, i grabbed my apron, rolled up my sleeves, and got to work. and wow, did i discover a lifesaver! this dish is not just quick but comforting, almost like a warm hug on a plate.
I wanted something that’d please the whole family, something that doesn’t take hours and won’t break the bank. you know, those weeknight dinners that can turn into an unexpected win? that's why i’m excited to share this recipe with you.
A Little History on the Dish
Did you know that chicken and rice is a classic combo dating back centuries? cultures all over the globe have their spicy takes—think spanish paellas, chinese fried rice, and middle eastern pilafs.
It's one of those comfort food recipes that never gets old.
Fast forward to today, this Quick Chicken and Rice Delight has made its way into American homes. Why is it so popular? It’s simple, delicious, and can be ready in 30 minutes —perfect for those frantic nights!
What's Cooking?
The prep for this dish is incredibly quick. you’re looking at about 10 minutes of chopping and stirring, followed by 20 minutes of magic on the stovetop.
Trust me; you’ll have enough time to kick back and enjoy a glass of something cold while the kitchen does its stuff.
And the best part? it yields four generous servings . just right for a family dinner, and if you’re feeling particularly generous, maybe even a neighbor in need! it’s budget-friendly too.
We’re all about those affordable meals that don’t skimp on flavor.
Why You’ll Love This Recipe
Let’s dive into some serious benefits, shall we? first off, this meal is packed with nutrients! with the chicken as your lean protein, plus all those savory vegetables , you get a wholesome dinner without feeling guilty—perfect for anyone watching their weight.
What about family gatherings or casual get-togethers? the beauty of this dish is that it caters to everyone. kids love it because it’s tasty, while adults appreciate the healthy angles—talk about a crowd-pleaser! it’s golden for those last-minute parties or weeknight dinners when visitors pop by.
And don’t get me started on the versatility! you can swap in different proteins, use whatever veggies you have in your fridge, and still call it a masterpiece.
It's just one of those simple chicken dishes that always fit the bill.
Optional Dish Enhancements
Want to bump it up a notch? toss in some herbs like fresh parsley or a pinch of red pepper flakes if you want that spicy kick! the kids might even forget that they’re munching on veggies.
If you're feeling might brave, consider trying some slow-cook variations for those lazy sundays—like a chicken and rice casserole that can cook itself while you binge your favorite series.
Before i reveal the ingredient list that you'll need for this fabulous dish, keep in mind that not only will this chicken meal prep idea save your sanity on busy nights, but it'll also become a regular in your kitchen rotation.
So, buckle up because we’re about to dive into the delicious world of Quick Chicken and Rice Delight!
Your Go-To Essential Ingredients Guide
Alright, friends! let’s dive into the essential ingredients guide to help you whip up quick, delicious chicken recipes like my ultimate go-to— quick chicken and rice delight in 30 minutes! it’s a simple, one-pan chicken and rice dish that’s perfect for those busy weeknights.
Seriously, it’s comfort food at its finest.
Premium Core Components
First things first, let’s talk about those premium core components you gotta have.
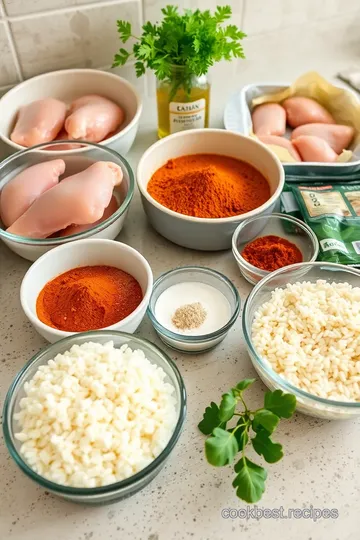
Measurements are key! grab your measuring cups because for our chicken and rice delight, you’ll want 1 lb (450 g) of boneless, skinless chicken breasts and 1 cup (200 g) of long-grain white rice.
These specific amounts will help you nail that fluffy rice texture—nobody likes a mushy situation, right?
Quality Indicators for Each Ingredient
Freshness matters! look for chicken that’s firm, with no off smells. check that rice has no holes or any darkness—just pure, yummy grains.
And don’t forget your herbs! try to snag fresh ones whenever you can. they bring that pop of flavor that dried simply can’t match.
Storage Guidelines & Shelf Life
Store your chicken in the fridge for 1-2 days . if you’re feeling smart, toss it in the freezer if you need more time.
The rice can last in the pantry well over a year if sealed properly. just ensure you’re keeping those little critters out!
Freshness Tips & Selection Criteria
When you’re shopping, grab those vibrant veggies—think bright peas and corn! They add color and nutrients to our dish. Freshness is the name of the game!
Signature Seasoning Blend
Now, let’s get to the fun part—your signature seasoning blend !
Essential Spice Combinations
A little salt, pepper, and oregano go a long way in bringing our chicken and rice to life. just think about layering flavors, folks! the ⅓ teaspoon of paprika gives it that mild smoky edge.
Herb Selections & Pairings
Pairing oregano with fresh parsley? Now that’s how you take this dish from basic to bomb! Toss in those herbs right at the end for that fresh kick.
Flavor Enhancers & Aromatics
Don’t skimp on the onion and garlic! Sauté them until they’re just golden, and watch your kitchen fill with the most intoxicating aroma. Your neighbors might just come knocking!
Smart Substitutions
Life is busy, and so is cooking. Sometimes, you don’t have exactly what you need.
Common Alternatives
If you’re out of chicken, turkey works just as well. and if you’re in a pinch with rice, quinoa can be a killer alternative! just adjust the liquid—check the package for wicked accuracy.
Dietary Modifications
Looking for healthier options? Opt for brown rice to boost that fiber content.
Emergency Replacements
Ran out of chicken broth? No problem! Water with a dash of soy sauce can do the trick in a pinch!
Kitchen Equipment Essentials
Before you crush this recipe, let’s make sure you have your kitchen equipment essentials !
Must-Have Tools
For the Quick Chicken and Rice Delight , a large skillet or sauté pan with a lid is non-negotiable! You want to trap that steam in while things are cooking.
Preparation Tips
Make sure to chop your ingredients before starting. It makes everything smoother.
Storage Solutions
If you have leftovers, store ‘em in an airtight container. They usually last 3–4 days in the fridge.
Whipping Up Magic: Quick Chicken and Rice Delight in 30 Minutes
Now that we’ve covered the basics to kick off your cooking adventure, let’s get ready to dive into your quick chicken and rice delight .
It's all about balance—easy, healthy chicken recipes that the whole family will love! you can prep it in just 10 minutes and cook it for 20 , bringing together a wholesome meal that'll satisfy those hunger pangs.
After all, who doesn’t love a delicious, nutritious dinner that’s ready in half an hour? perfect for those crazy weeknights or make-ahead dinners for the days ahead.
So grab your apron, and let's hit the kitchen!
Stay tuned for the cooking instructions that'll have you serving up one of the best quick comfort food meals around. You're gonna love it!
Professional Cooking Method: Making Comfort Food with Confidence
When you're in the kitchen, the last thing you want is chaos. so, let's dive into some essentials of professional cooking that will turn you into a kitchen rock star.
Whether you’re cooking up a quick chicken and rice delight in 30 minutes or whipping up a feast for family and friends, a good method will get you there smoothly.
Essential Preparation Steps
First off, we need to talk about mise en place . it's all about getting everything organized before you start cooking.
Chop those veggies, measure your ingredients, and have everything within arm’s reach. this makes cooking feel like a breeze and helps you avoid scrambling for that missing can of broth!
Next up: time management . Set a timer for each step. This keeps you in check and prevents overcooking. If you're making easy chicken recipes, you need those chicken pieces just right—don’t have rubbery chicken on your hands, right?
In terms of organization , use containers for your prep. group similar ingredients together—meats in one area, spices in another.
It’s a simple strategy, but it clears up your workspace and keeps your head in the game. and don't forget safety considerations ! keep that cutting board steady and your knives sharp; accidents happen when things are messy or dull!
Step-by-Step Process
Alright, now we’re getting to the fun part—cooking! Here are some clear, numbered instructions for whipping up that Quick Chicken and Rice Delight .
-
Heat Olive Oil: Get your skillet hot—medium-high heat works wonders here.
-
Sauté Onions and Garlic: Toss in your diced onion. Cook it until it’s translucent , about 3- 4 minutes . Then add garlic and let it sizzle for a bit—smells amazing!
-
Cook chicken: next, add those chicken pieces, seasoning them well. cook until they’re no longer pink in the middle—aim for an internal temp of 165° f .
This takes about 5- 7 minutes .
-
Add Rice and Broth: Yup, stir in that rice, followed by the broth. Make it bubble and boil!
-
Simmer: Turn down the heat, cover up, and let it simmer—this is the magic moment! Wait about 15 minutes . You want that rice to soak up all the goodness.
-
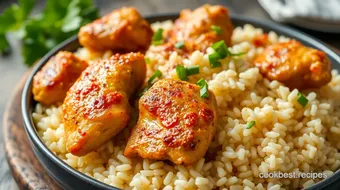
Add vegetables: stir in your mixed veggies just a few minutes before you’re ready to serve. this way, they retain some crunch.
Fluff up the rice with a fork and adjust the seasoning as needed—taste test, folks!
-
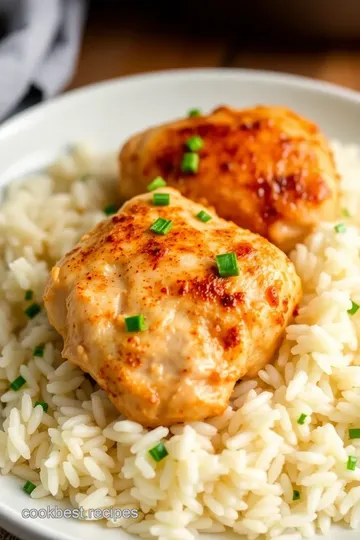
Serve: Garnish it with some parsley if you’re feeling fancy. Serve it up and enjoy!
Expert Techniques
Wanna elevate your game? Here are some professional methods to keep in mind.
- Always taste as you go! It’s crucial for adjusting flavors and making sure you’re on the right track.
- Pay attention to timing precision ; undercooked or overcooked items can ruin your dish.
- Use visual cues like color and texture. Chicken should be perfectly browned, and rice should be fluffy—not clumpy.
If something goes wrong, like burnt garlic or soggy rice, do not panic! Just recalibrate. Cooking is about learning. Adjust and keep going.
Success Strategies
Let’s talk about what not to do. Here are some common mistakes to avoid:
- Don’t rush through the sautéing. It builds flavor and is key to delicious chicken recipes.
- Skipping the resting time after cooking? Big no-no! It allows the flavors to settle.
For those looking to prepare in advance, consider make-ahead options . You can pre-cook the chicken and store it in the fridge, so it’s ready for your next quick meal.
Additional Information
Combining great techniques with delicious recipes makes cooking feel like a hobby rather than a chore. the quick chicken and rice delight you just made is not just fast; it’s also health-packed—perfect for those busy nights when you want a satisfying family-friendly dinner.
Plus, if you get the hang of this, you’ll find yourself exploring tons of quick rice dishes and one-pan chicken recipes like a pro.
So, what are you waiting for? Get in the kitchen and whip up this tasty, comfort food recipe tonight, because honestly, who doesn’t love a delicious chicken recipe that comes together in 30 minutes ? Your friends and family are going to thank you for this!

Pro Tips & Secrets
Okay, let’s start with some insider tips to make your Quick Chicken and Rice Delight in 30 Minutes even more delicious.
First off, sauté the onions and garlic until they’re golden . This little step makes a big difference, trust me! You’ll be amazed at how deep and rich those flavors become.
For a little time-saving magic, use pre-cooked chicken . You can shred it or dice it up, toss it in, and skip the browning part! It’ll save you a good few minutes.
Need to add some pizazz? try a sprinkle of fresh herbs right before serving. fresh parsley is classic, but basil or cilantro would work wonders too.
It’s all about making that dish pop!
Perfect Presentation
Now let’s talk presentation . I know, I know—you're probably saying, "I’m just making dinner!" But hear me out. A well-plated dish can make a regular Tuesday feel a bit fancy!
When serving, fluff the rice with a fork. it’ll look more inviting, and let’s be real, we eat with our eyes first! you can add colorful garnishes, like sliced cherry tomatoes or a few sprigs of parsley.
Consistent color is key, so aim for a good mix of colors on your plate.
And don’t be shy about the dishware ! A nice white plate makes the hues of your chicken and veggies really stand out.
Storage & Make-Ahead
Got leftovers? here’s how to store them right. let the chicken and rice cool, then pop it in an airtight container.
It’ll stay good in the fridge for about 3-4 days . if life gets busy, you can make this ahead! it’s a perfect make-ahead dinner option.
When you're ready to chow down, just reheat in the microwave. add a splash of broth or water to keep it juicy and not dry out.
Remember, for reheating, make sure it’s heated to 165° f !
Creative Variations
Feeling adventurous? Spice things up with some creative variations !
For a twist, how about adding lime zest and cilantro for a refreshing mexican-inspired vibe? you could also throw in some salsa to give it a zesty kick! if you’re looking to jazz it up for the fall, add some pumpkin cubes or even butternut squash to the mix.
You can also mix things up based on dietary needs. Substitute chicken for tofu for a vegetarian option, or bump up the veggies! Just chop and toss in whatever non-starchy veggies you have handy—that’s the beauty of a one-pan chicken and rice dish!
Complete Nutrition Guide
Let’s get real about the health benefits of this dish. it’s colorful, hearty, and full of lean protein. each serving packs about 30g of protein , which is fantastic for muscle repair and keeping you feeling full.
Plus, it's under 400 calories per serving—pretty great for a filling meal!
And if you’re looking to keep sodium down, use low-sodium chicken broth . For those counting calories, this meal is not just quick, but also a part of your low-calorie meals lineup.
Expert FAQ Solutions
Got questions? No worries! Here’s a troubleshooting guide for when things don’t go as planned.
If your rice is undercooked, it might need more liquid. just add a little broth and give it some time.
If it’s too sticky, fluff it up with a fork and serve! for dryness, again, a splash of broth can work wonders.
Feeling like taking the plunge into one of those quick chicken dishes ? don’t hold back! making the jump from tossing together a frozen pizza to cooking a simple chicken dish will open you up to so many amazing comfort food recipes that you can whip up in just 30 minutes.
So there you have it! your quick chicken and rice delight in 30 minutes isn’t just another dinner option; it’s a family-friendly dinner that can transform busy nights into a feast to remember.
Don’t be shy—get creative, play with flavors, and make it your own! you’ll be impressing your taste buds and your loved ones in no time.
Happy cooking!
Quick Chicken and Rice Delight Card
⚖️ Ingredients:
- 1 lb boneless, skinless chicken breasts, cut into bite-sized pieces
- 1 cup long-grain white rice
- 2 tablespoons olive oil
- 1 medium onion, diced
- 2 cloves garlic, minced
- 1 cup frozen mixed vegetables (peas, carrots, and corn)
- 2 ½ cups low-sodium chicken broth
- 1 teaspoon dried oregano
- ½ teaspoon paprika
- Salt and pepper, to taste
- Fresh parsley, for garnish (optional)
🥄 Instructions:
- Step 1: In a large skillet, heat olive oil over medium-high heat.
- Step 2: Add diced onion; cook until translucent, about 3-4 minutes. Stir in minced garlic; sauté for another minute until fragrant.
- Step 3: Add chicken pieces to the skillet, season with salt, pepper, oregano, and paprika. Cook until the chicken is browned and cooked through, about 5-7 minutes.
- Step 4: Stir in the rice, then pour in the chicken broth. Bring to a boil.
- Step 5: Reduce heat to low, cover, and let simmer for 15 minutes or until the rice is tender and the liquid is absorbed.
- Step 6: Stir in frozen mixed vegetables during the final 3-5 minutes of cooking. Fluff the rice gently with a fork and adjust seasoning if needed.
- Step 7: Garnish with fresh parsley, if desired, and serve hot.
Previous Recipe: Ultimate Slow Cooker Chorizo Chili - Easy & Flavorful for Cozy Nights!
Next Recipe: How to Make Delicious Fried Swordfish Nuggets with Crunchy Coating