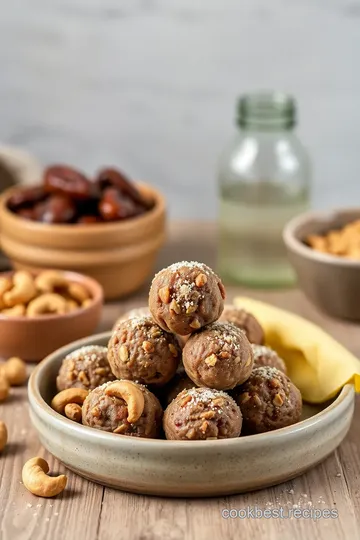
No-Bake Cashew Date Energy Balls
Looking for a quick and tasty snack? Try my No-Bake Cashew Date Energy Balls (40 min)! These bites are nutritious, easy to make, and full of flavor. Enjoy!
: Deliciously Simple!")
A Sweet Surprise: My Journey to No-Bake Cashew Date Energy Balls (40 min)
Oh my gosh, let me tell you about the first time i tried making no-bake cashew date energy balls . i was knee-deep in a “i need something healthy” phase, binge-watching a documentary on clean eating.
The film glorified these little bites of joy, claiming they could turn you into a superhero. seriously, i thought to myself, “how hard could it be?” spoiler: it was super easy and totally delicious.
Connecting to that wholesome goodness in the food we eat makes life better, doesn’t it?
No-bake snack recipes like these energy balls are not only tasty, but also come with a cool backstory. these little delights date back to traditional energy snacks that athletes and health-nuts loved.
They’re perfect for our busy lives, giving us a quick boost of energy when we need it most. in today’s fast-paced world, it’s like a miracle that something so simple can still be a hit.
Plus, they’re gluten-free and use only natural sweeteners. you get the energy boost you need without all the guilt, right?
Recipe Overview: Wholesome Goodness in 40 Minutes
Making no-bake cashew date energy balls is as easy as pie. well, maybe pie doesn’t count because you actually have to bake those! but really, this recipe takes around 40 minutes : about 15 minutes of prep and then 30 minutes chilling in the fridge.
It’s a beginner-level effort— like learning how to ride a bike. if you've got a food processor and a few ingredients lying around, you’re golden.
I mean, who doesn't love a quick and healthy snack that saves you from munching on chips?
Cost-wise, you won’t break the bank either. these nut-based snacks use raw cashews and medjool dates , both of which you might already have in your pantry.
A batch yields about 12 energy balls , making it a satisfying treat without a hefty price tag.
Why You Need These in Your Life
Besides being a breeze to make, these cashew energy balls are a powerhouse of nutrients! rich in healthy fats, they bring a punch of protein while keeping your energy levels high.
Plus, if you’re into post-workout snacks, look no further. they are packed with natural sweeteners , making them a great option for health-conscious folks or anyone wanting a guilt-free treat.
These little bites shine during special occasions too—think potlucks or birthday parties. they make a great conversation starter. “oh, what’s that delicious smell?” you can casually reply, “just my homemade date energy bites !” and the best part? everyone can enjoy them! they fit right into vegan, dairy-free, and even paleo diets.
You might also impress your friends with how easy it is to incorporate wholesome snack recipes into your everyday life.
Some unique selling points stand out, especially when comparing them to similar recipes. unlike store-bought protein bars, they don’t have any added preservatives or funky ingredients.
They’re also customizable. want a little kick? toss in some chia seeds or spices like cinnamon. if you're feeling adventurous, roll them in cacao powder for a chocolatey twist.
Trust me, flavor is so not an issue here.
Ready to surprise yourself with a super easy, healthy, and utterly delicious snack? Of course, you are! Let’s explore the ingredients, and get those energy balls rolling! You’re gonna love how satisfying and fulfilling these No-Bake Cashew Date Energy Balls are!
Essential Ingredients Guide
When diving into the world of no-bake cashew date energy balls , it’s all about quality ingredients! trust me, you want the best stuff for those tasty treat bombs.
Here’s a breakdown of what you’ll need, along with tips to ensure everything you whip up is fresh and delightful.
Premium Core Components
Let’s talk about what’s essential.
-
Raw Cashews: You’ll need 1 cup (150g) of these little nuggets of goodness. Look for ones that are plump and creamy-looking. Fresh cashews should be slightly soft to the touch.
-
Medjool dates: you’ll want 1 cup (150g) of these, around 10 dates . check for a rich caramel color, and they should be sticky but not dried out.
If they’re crumbly, skip ‘em!
-
Coconut (optional): Grab 1/4 cup (25g) of shredded coconut if you’re feeling fancy. Make sure it’s unsweetened!
-
Vanilla Extract: This adds a lovely flavor. Just 1/2 teaspoon will do—go for pure if you can find it.
-
Sea Salt: Just a pinch makes a world of difference, balancing that sweetness like a pro.
Now, fresh ingredients have a much longer shelf life than you think! store your nuts in an airtight container in the fridge.
They can last for about 6 months that way. dates can hang out in a cool, dry place for up to 12 months .
Win-win!
Signature Seasoning Blend
While these energy balls are going to shine on their own, there’s no harm in jazzing things up.
-
Flavor Boosts: Want to kick up the flavor? A dash of cinnamon or nutmeg can offer a warm hug in every bite!
-
Coconut & nuts: if you decide to roll them in additional shredded coconut or chopped nuts, it amps up both flavor and texture.
Just sprinkle a little on your plate and give those balls a spin. perfect for that instagram-worthy shot!
Smart Substitutions
Running low on something? No worries!
-
Nuts: If you’re allergic or just can’t find cashews, almonds work great too, or you could substitute with sunflower seeds for a nut-free option.
-
Dates: No Medjool dates in sight? Try using dried figs or apricots. They won’t taste the same, but they’ll still be sweet!
-
Coconut: Can’t find shredded coconut? Ground oats can act as a solid substitute.
Kitchen Equipment Essentials
Let’s make this super easy.
-
Must-Have Tools: Get your hands on a food processor . You’ll really rely on this little champ. A mixing bowl and a baking sheet or plate for chilling are also necessary.
-
Preparation Tips: Set aside all your ingredients first. It makes the process smoother! I'm serious; it saves time and mess.
Wrapping It All Up
Now that you’re armed with all this info about the necessary ingredients for your No-Bake Cashew Date Energy Balls, you’re on your way to creating nut-based snack recipes that are not just healthy but also kid-friendly and downright scrumptious!
Whip these up for a quick snack when you’re on the go or post-workout. and if you want to take it a step further, think about how these could fit into your clean eating lifestyle or serve as guilt-free treats when that sweet tooth strikes.
So, grab those ingredients and let’s dive into the step-by-step instructions to make these nutritious treats . you’re gonna love how easy it is to turn them into simple energy bites packed with flavor and health benefits! just wait until you bite into one; it’s totally nutrient-dense and satisfying.
Stay tuned for the fun part!
Mastering Professional Cooking: Your Guide to Kitchen Success
Cooking isn’t just about food; it’s an art! if you’re ready to step up your kitchen game, let’s dive into the professional cooking methods that will have you cooking like a pro in no time.
And trust me, you don’t need to wear a chef's hat to master these techniques!
Essential Preparation Steps
First things first, you need to get your act together with some mise en place . this fancy term just means getting everything ready before you start cooking.
Chop your veggies, measure your spices, and love on your ingredients. it’s like a pre-game huddle for your meals!
Next comes time management . set a timer—like those funny alarms that go off at the most random moments—and stick to it! cooking is all about timing, especially when you're making dishes that take practice to perfect.
Now, let’s chat organization. use your countertop wisely. keep like items together. if you’re cooking savory dishes, everything from oils to spices should be close at hand.
And remember, organization isn’t just pretty; it’s safe. you want to avoid making mistakes or spills, so keep it tidy.
Speaking of safety, always be mindful of kitchen hazards. don’t be that person who forgets they have a pot on the stove.
Watch those knives! make it a point to use oven mitts when handling hot pans or trays. common sense, right? sure, but it’s worth repeating.
Step-by-Step Process
Ready to follow some straightforward steps? Here we go!
-
Gather Your Ingredients : Mingling together all your goodies is a must. Think of it like throwing a party where the food steals the spotlight.
-
Temperature Control Points : This is crucial. If a recipe says to preheat the oven to 350° F , do it first before you get cooking. It’ll help everything cook evenly.
-
Timing Precision : Use your timer like it’s your best friend! If you’re roasting veggies for 20 minutes , set that timer. Nothing worse than burnt broccoli!
-
Visual cues for doneness : keep an eye on your food. chicken should hit an internal temp of 165° f to be safe.
Pasta? perfect al dente looks like it’ll hold its shape but isn't hard in the center.
Expert Techniques
Let’s talk insights from the pros, shall we? One critical step is to know when to taste. Don’t just throw everything in without sampling. Season as you go. Taste makes perfect!
Now, quality checkpoints are key. Are your ingredients looking fresh? Don’t hesitate to toss wilted greens or anything that has seen better days. Always go for the best.
And if you find yourself in a pinch, let’s troubleshoot! if your sauce is too thin, simmer it a bit longer to thicken.
If it’s too salty, toss in some diced potatoes (yes, really!) to absorb the excess.
Success Strategies
You wanna avoid common mistakes, right? here’s a nugget of wisdom: don’t skip the prep! a little work upfront goes a long way.
Also, keep things simple—try not to juggle five recipes at once.
For quality assurance, taste before you serve. Trust me, no one wants a bland dish sent to the table. A dash of salt or splash of lemon can elevate your dish to new heights!
And hey, planning is essential. whip up large batches of your favorite recipes and freeze portions. those no-bake cashew date energy balls (40 min) ? they are great for meal prep! trust me; you’ll thank yourself when you’re tired after a long day.
Conclusion
So there you have it! these professional cooking methods may sound fancy, but they really just boil down to being organized, mindful, and willing to learn.
And when you mix these insights with passion, you’ll whip up some amazing nut-based snack recipes —like those tasty no-bake cashew date energy balls .
They’re a perfect quick energy snack to keep you fueled throughout the day!
Feeling inspired? Let’s dive into additional information so you can keep that kitchen sizzling!
All the Deets You Need for No-Bake Cashew Date Energy Balls
Alright, friends! if you’re diving into the world of no-bake cashew date energy balls , (40 min) get ready to learn some insider tips that’ll make your life easier and tastier.
These tasty little bites aren’t just simple to whip up; they come packed with loads of goodness too, making them one of my fave nut-based snack recipes .
Let’s break it down, shall we?
Pro Tips & Secrets
First things first: chef's personal insights . trust me, using fresh, plump medjool dates is a game changer. if your dates are feeling a bit too dry, do what i do—give ‘em a quick soak in warm water for about ten minutes.
They’ll get all soft and gooey, perfect for binding your energy balls.
Now, on to time-saving techniques . chop those cashews in a food processor, but don’t go overboard. you want them finely chopped, not a dust cloud.
It’s all about that perfect texture ! and hey, if you’re like me, a little vanilla extract goes a long way in boosting those flavors without extra fuss.
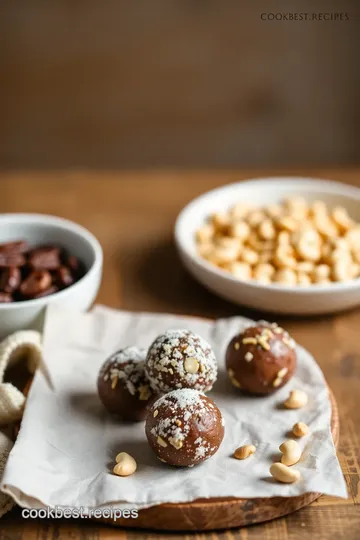
Also, sprinkle on that pinch of sea salt —seriously, it makes all the difference. it brings out the sweetness in those dates! and if you wanna get fancy, roll your energy balls in shredded coconut or chopped nuts for an extra flavor punch.
Perfect Presentation
Let’s talk looks. we eat with our eyes first, right? for plating techniques , just throw those energy balls on a cute plate or in a mason jar.
Instant charm! you could even layer them with pieces of fresh fruit for that pop of color.
For garnish ideas , wrap them in a little parchment paper and tie it up with twine. guests will be impressed, and it takes only a minute.
And don’t forget about color combinations ; bright fruits beside your energy balls can make your snack table sing!
Storage & Make-Ahead
Now, onto the storage guidelines . if you’re like me and can’t resist these delicious date energy bites , make sure to keep ‘em in an airtight container in the fridge.
They’ll last about a week but trust me, they won’t last that long! if you’re preppin’ for the week, these babies are perfect for make-ahead munching.
Just follow your preservation methods and you can enjoy them all week long.
Creative Variations
Feeling a little adventurous? let’s spice things up with some creative variations . instead of cashews, try almonds or pecans for a nutty twist.
Wanna go pumpkin spice? toss in some cinnamon or nutmeg and watch those flavors bloom.
If you’re keeping it vegan , you’re already set! these vegan energy balls are packed with nutrients and great for anyone.
Plus, switching out the dates for figs or apricots gives them a new vibe.
Complete Nutrition Guide
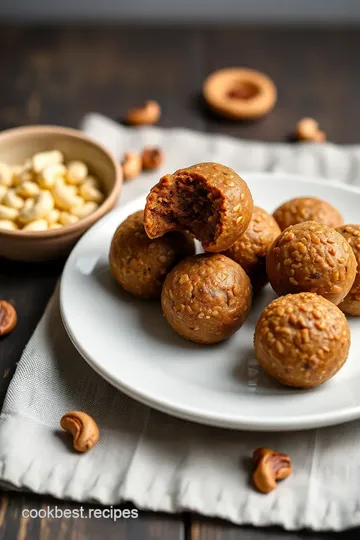
Now, for the complete nutrition guide —you’re going to love this. each ball delivers about 98 calories, 2 grams of protein, and they have healthy fats from the cashews.
They're perfect for a quick boost or as a post-workout snack .
If you're watching your sugars, don’t stress. these gluten-free energy bites are sweetened naturally, making them cool and guilt-free. not to mention, they’re packed with fiber! just be mindful of your portions.
One or two balls should do the trick!
Expert FAQ Solutions
Let's tackle some beginner questions. if your energy balls are gooey, you haven’t blended them enough! keep that food processor going! and if they fall apart, maybe they need more dates or a bit of water to hold ‘em together.
Wrapping Up
So, there you have it! The lowdown on my beloved No-Bake Cashew Date Energy Balls (40 min) . These little nuggets are not just simple energy bites ; they're a delicious, healthy treat that you can easily whip up and modify based on what you love!
Get in the kitchen and experiment. whether it’s trying out new flavors or presenting them in a fun way, the possibilities are endless.
You got this! enjoy responsibly and remember, sharing these delights just might make you the favorite friend. happy snacking!
No-Bake Cashew Date Energy Balls Card

⚖️ Ingredients:
- 1 cup (150g) raw cashews
- 1 cup (150g) Medjool dates, pitted (about 10 dates)
- 1/4 cup (25g) shredded unsweetened coconut (optional)
- 1/2 teaspoon vanilla extract
- Pinch of sea salt
- Additional shredded coconut (for rolling, optional)
- Chopped nuts or cacao powder (for rolling, optional)
🥄 Instructions:
- Step 1: Gather all ingredients and equipment.
- Step 2: In the food processor, pulse raw cashews until finely chopped but not a powder.
- Step 3: Add the pitted dates, shredded coconut (if using), vanilla extract, and sea salt to the food processor. Process until the mixture becomes sticky.
- Step 4: Scoop out tablespoon-sized portions of the mixture and roll into balls.
- Step 5: Place formed balls on a baking sheet or plate lined with parchment paper. Refrigerate for 30 minutes to firm up.
- Step 6: Roll the chilled energy balls in additional shredded coconut, chopped nuts, or cacao powder if desired.
- Step 7: Enjoy immediately or store in an airtight container in the fridge.
Previous Recipe: How to Bake Cranberry Orange Bars with Chia Jam: A Delicious Delight
Next Recipe: Delicious Stovetop Apple Oatmeal with Cardamom: The Ultimate Cozy Breakfast!