Blend Vanilla Beans: Easy Homemade Vanilla Paste
Discover how to blend vanilla beans into an easy homemade paste! Perfect for gourmet baking and elevating your desserts. Check out my recipe for tips!

- Introducing Vanilla Awesomeness: Blend Vanilla Beans: Easy Homemade Paste
- A Flavorful Journey Through Time: Recipe Overview
- Why This Paste is a Game-Changer: Key Benefits
- Let’s Gather the Goodies: Transition to Ingredients
- Essential Ingredients Guide
- The Art of Professional Cooking: Essential Steps and Techniques
- Add a Touch of Gourmet to Your Baking: Crafting Homemade Vanilla Paste
- Frequently Asked Questions
- Recipe Card
Introducing Vanilla Awesomeness: Blend Vanilla Beans: Easy Homemade Paste
Okay, everyone, quick question: have you ever opened up a jar filled with home-baked goodies and thought, “man, how do i get that rich vanilla flavor?” i mean, it can be a game-changer for your baking.
When i started baking for my family, i was like this mad scientist in the kitchen. i tried so many things, but one ingredient stood out: vanilla .
That’s when i discovered how to blend vanilla beans into a luscious, easy homemade paste that transformed my cakes and cookies from basic to oh my gosh, i need the recipe! and honestly? this stuff is like liquid gold for baking.
Let me walk you through the magic of Blend Vanilla Beans: Easy Homemade Paste —a straightforward way to elevate your desserts, making them taste like they just came from an artisan bakery.
A Flavorful Journey Through Time: Recipe Overview
Now, let’s talk about where this deliciousness comes from. people have been using vanilla for ages—like, we’re talking centuries! vanilla originally hails from central america, where the aztecs used it to flavor their chocolate drinks.
Fast forward to today, and vanilla is a kitchen staple for bakers across america (and the world!). this homemade vanilla paste is a modern-day twist —it’s super popular because who doesn’t want that rich vanilla flavor without all the fuss?
Got a spare 15 minutes? that’s all the prep you’ll need! no cooking, just mixing, and blending. and you’ll yield a whole cup of this paste for about the price of a fancy latte.
It’s easy, it’s budget-friendly, and trust me, you’ll want to keep it handy for all your upcoming baking adventures.
Why This Paste is a Game-Changer: Key Benefits
Now, let’s get to the meat and potatoes of why you should be making this paste. first off, it’s loaded with health benefits! pure vanilla extract contains antioxidants and has even been shown to help reduce stress (umm, yes please!).
Imagine baking with a vanilla bean paste that not only tastes amazing but can also boost your mood. that’s a win-win!
What i really love about this paste is its versatility. you can use it in everything from flavorful icings to coffee creamers, and it's especially perfect for special occasions.
Think birthday parties or holiday feasts —your desserts will be the star of the show!
It's far superior to smaller bottles of store-bought vanilla extract , which can sometimes have added sugars or artificial flavors.
This homemade version ensures that you're getting the best possible quality. plus, it's a fun way to impress your friends with your diy flavoring skills !
Now, as you dive into that bowl of dreamy paste, just imagine those cakes and cookies popping with vanilla goodness —it's totally a baking essential.
You’ll be able to create gourmet treats that wow everyone at the next dinner party!
Let’s Gather the Goodies: Transition to Ingredients
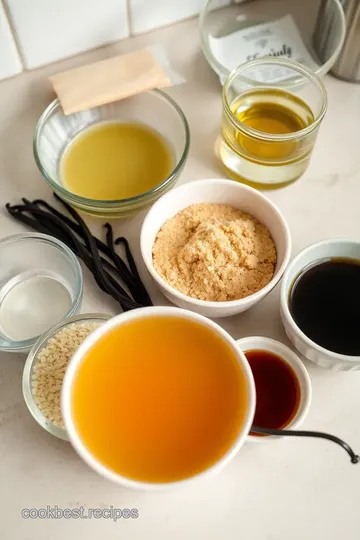
So, you’re ready to dive into this tasty adventure, right? let’s gather the ingredients so you can whip up this easy homemade paste .
Grab those vanilla beans, some light corn syrup, and, oh yeah, optionally some glycerin if you want that silky consistency.
Hang tight; we’ll get into the nitty-gritty of blending those beans into a paste that’ll have your desserts tasting like they’re from the top tier of gourmet bakeries .
Now, without further ado, let’s make some delicious magic in the kitchen! Get those ingredients ready because you won’t want to miss out on this one!
Essential Ingredients Guide
Alright, friends! let’s chat about something that makes all your sweet treat recipes ten times better: vanilla . seriously, it’s like the superstar of the flavor world.
You ever whip up a batch of cookies or cakes, and that whiff of vanilla hits you? it’s pure bliss.
So, buckle up because today we’re diving deep into the world of vanilla—particularly, we're gonna blend vanilla beans: easy homemade paste .
It’s a game changer, trust me.
Premium Core Components
Let’s start with the basics. If you want to nail this homemade vanilla paste, you gotta know your sweet ingredients:
- Vanilla Beans : Look for plump, oily pods . They should smell rich and fragrant. Super important: the fresher, the better!
- Corn Syrup : You’ll need about 1 cup (240 ml) . It helps with consistency.
- Water : Same here, 1 cup (240 ml) . Just plain old water.
- Glycerin (optional) : This is like the magic elixir for a perfect texture. You’ll need 2 tablespoons (30 ml) if you want that silky feel.
Signature Seasoning Blend
Here’s the thing: once you’ve got that vanilla paste down, the world is your oyster! Think about spicing it up:
- Essential Spice Combinations : You can add a pinch of nutmeg or cinnamon to your vanilla paste for a warm note.
- Herbs and Pairings : Vanilla pairs beautifully with mint and chai spices . Get creative!
Smart Substitutions
Now, life happens, and sometimes you don’t have exactly what you need. No worries!
- Common Alternatives : If you’re out of vanilla beans, grab some pure vanilla extract instead. Just remember, a little goes a long way—about 1 tablespoon should do.
- Dietary Modifications : Need it vegan? Stick to the corn syrup and skip the glycerin! Use plant-based options.
Kitchen Equipment Essentials
You don’t need a fancy setup for this. Here’s what you’ll need:
- Must-Have Tools : A sharp knife or kitchen shears to cut those beans, and a blender or food processor to blend it all up smoothly.
- Storage Solutions : A cute little jar or container with a lid is all you need to keep that homemade magic safe.
Freshness Tips and Selection Criteria
When you’re out shopping or browsing online for your ingredients, remember these easy tips:
- Quality Indicators for Vanilla Beans : Look for dark brown or black beans that feel slightly sticky and are flexible—not dried out. No one wants a sad vanilla pod!
- Storing Your Paste : Once you whip up your vanilla bean paste , it can last up to a year in a cool, dark place. Don’t forget to label and date that jar!
Why Use Vanilla Paste?
Let me tell ya, using that luscious vanilla paste over extract will seriously elevate your baking game. it’s thicker and carries a more intense flavor thanks to those tiny seeds.
Think about it: you’re not just using plain ole vanilla; you’re crafting a gourmet experience right in your own kitchen.
Try swirling it into your whipped cream for dessert toppings or sneaking it into cookie dough for an extra layer of flavor. Panna cotta, anyone? The possibilities are limitless!
So, are you ready to roll up your sleeves and dive into this delicious diy? by the time you’re done, you’ll be the proud creator of not just vanilla paste but an irresistible appeal to everyone’s taste buds.
Let’s jump into those easy step-by-step instructions and make this happen!
The Art of Professional Cooking: Essential Steps and Techniques
Ready to step up your kitchen game? whether you’re prepping for a big dinner or trying your hand at baking with vanilla, professional cooking methods can elevate your culinary adventures! let’s dive into some essential preparation steps, a fun step-by-step process, and a few expert techniques.
Trust me, you’ll want to take these tips to heart!
Essential Preparation Frenzy
Oh my gosh, preppin’ your kitchen right is like laying the groundwork for a masterpiece! first up is mise en place —it’s a fancy way of saying, “get your stuff together!” chop your ingredients, measure them out, and have them ready to go.
This will save you time and keep the chaos at bay.
Next, let’s talk about time management . if you don’t have a timer, get one! create a timeline based on your vanilla bean recipes .
Get that oven preheated to 350° f before you even think about mixing. this way, while you’re whisking and stirring, you won’t forget to crank up the heat.
Speaking of chaos, organization is key. use bowls to group similar ingredients. if you need salt, grab it, don’t run around looking for it halfway through mixing.
Lastly, when working with hot stuff, always keep safety in mind. use oven mitts and don’t forget to keep your workspace clean.
A tidy area is a happy area!
Step-by-Step Success
Here’s the deal: follow clear instructions like your life depends on it! think of cooking as a recipe for success, like our blend vanilla beans: easy homemade paste .
Here’s how you whip it up:
-
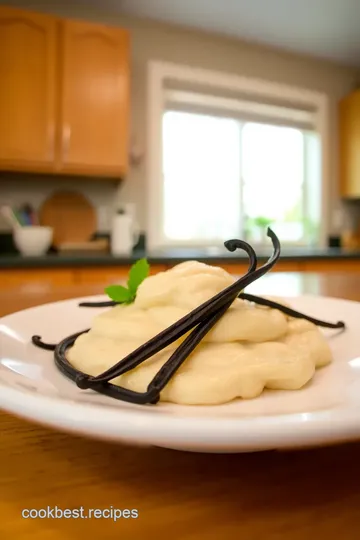
Prepare Your Beans: Split and scrape the seeds from 6-8 vanilla beans . Save the pods, too! They’re flavor powerhouses.
-
Mix It Up: In a saucepan, stir together the seeds, pods, 1 cup light corn syrup , and 1 cup water . Heat gently—don’t let it boil.
-
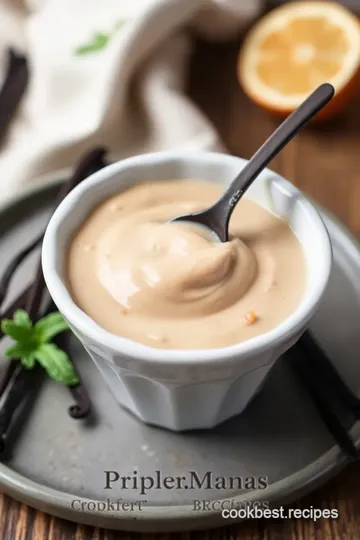
Blend It Smooth: Once combined, pour into a blender and whip it up until it’s all smooth and creamy.
-
Consistency Check: Adding 2 tablespoons glycerin can amp up the texture but isn’t necessary.
-
Store It Right: Pour your paste into a jar and let it cool before sealing. Just like that, you have your own homemade vanilla paste!
Timing is everything —this whole process takes about 15 minutes total and delivers a rich, aromatic vanilla bean flavor that’ll make your desserts sing!
Expert Techniques for the Win
Now, don’t just wing it; nail it with these expert techniques! first off, check your ingredients for quality. fresh, plump vanilla beans pack a punch! magical flavor comes from gourmet baking with quality, not shortcuts.
Also, keep checkpoints in mind. taste your paste as you go! if it’s lacking, don’t be afraid to adjust by adding more seeds.
Need troubleshooting tips? if your paste is too thick, add a splash more water or corn syrup and mix again.
Easy peasy!
Strategies for Success: Avoiding the Pitfalls
Believe me; i’ve made every mistake in the book (or the kitchen)! don’t skip the preparation steps. trust me, you’ll bake more evenly and save time in the long run.
Also, be careful not to overheat your mixture— nothing good comes from boiling vanilla !
Quality assurance is key. make sure everything is measured accurately. and, hey, if you want to prep in advance, this paste can be made up to a year ahead! just store it in a cool, dark place for the best results.
So, next time you’re drooling over a sweet treat recipe or thinking about a flavorful icing technique, remember this homemade vanilla paste and how versatile it can be.
Toss it into whipped cream for dessert or mix it in a cake for that genuine vanilla kick. the possibilities are endless!
Incorporating homemade ingredients like this into your cooking makes you feel like a rockstar. But if you want to know more about using vanilla in icings or perhaps a vanilla paste substitute , stay with me—there’s plenty more flavor-packed info comin’ your way!
Additional Information
The journey doesn't end here! whether you’re crafting homemade pastes or whipping up a batch of vanilla bean syrup, get ready to rock the kitchen.
Stick around for even more tips and tricks that’ll make your next bake the tastiest yet!
Add a Touch of Gourmet to Your Baking: Crafting Homemade Vanilla Paste
Oh my gosh, you guys! if you love the rich vanilla flavor found in all those gourmet dessert recipes, then let me tell you about my new favorite kitchen staple: blend vanilla beans: easy homemade paste .
Seriously, this stuff is such a game-changer for anyone who loves to bake. it's not just another diy baking ingredient —it brings a whole new level of oomph to your baking essentials .
Let’s dive into the good stuff!
Pro Tips & Secrets to Nail Your Vanilla Paste
Now, let me share some treasured pro tips i’ve picked up along the way. first off, always pick fresh vanilla beans .
The fresher the beans, the more intense your vanilla flavor will be—trust me on this. when you get home, before you begin, just take a moment to appreciate those beautiful beans.
They smell heavenly!
Time-saving technique: when you prep your beans, slice them lengthwise and then scrape out the seeds using the back of your knife.
You can toss the emptied pods right into your mix for extra flavor —they don’t need to go to waste!
For enhancing flavor, try adding a touch of glycerin . it gives the paste a silky consistency and a deeper flavor while keeping it nice and thick.
And you know what? don’t neglect presentation either.
Perfect Presentation: Pipe It Pretty
After you’ve whipped up this vanilla paste, let’s talk about how to make it visually appealing! you can store it in a cute jar with a tight lid, and don’t forget to label it.
A little twine or ribbon around the jar makes a beautiful gift for the baker in your life.
While we're at it, think about how you will use this golden goodness . experiment with piping on your cakes, drizzling over ice creams, or giving your flavorful icing techniques a kick.
It’s not just about flavor; you want eye-catching desserts too!
Storage & Make-Ahead: Keep It Fresh
Alright, listen closely! if you want this vanilla paste to last and remain flavorful, store it in a cool, dark place.
Keep in mind, if you properly seal your jar, your paste can last up to a year. so, no worries if you're making a bigger batch for your next baking adventure.
When it comes to reheating , there's really no need—it’s ready to go straight from the fridge. if it thickens up a bit, just give the jar a little shake or stir.
It’s about keeping those sweet treat recipes easy and fun!
Creative Variations: Switch It Up!
Don’t be afraid to get creative with your homemade vanilla paste! what about jazzing it up with some cocoa powder? yep, you can whip up a chocolate vanilla paste that's perfect for brownies or cookies.
Or add a dash of spices like cinnamon for a warm, cozy feel.
If you're feeling adventurous, you can even explore seasonal twists—think pumpkin spice for fall or fresh berries in summer. This is where the fun really begins.
Complete Nutrition Guide: Eat (and Bake) Smart
Now, let’s get a little bit serious for a sec. this paste is a delicious addition to your baking, but keeping an eye on the nutrition is essential.
Each tablespoon offers about 56 calories, with a good chunk being sugar, so enjoy it sparingly. you know what they say: moderation is key!
One of the best parts about using a homemade vanilla paste is the use of natural sweeteners . you control what's in there, and you can adjust to fit your dietary needs while still enjoying those gourmet desserts .
Conclusion: Time to Vanilla Up Your Life!
So there you have it, my lovely bakers! from the basics of crafting your own homemade vanilla extract to bringing the spotlight to your desserts, this vanilla bean paste is a must-have! add it to your list of kitchen staples for bakers and elevate all your vanilla bean recipes .
Trust me; when you experience the flavor boosts from using real vanilla bean paste, you'll understand why it’s worth the effort.
Now go out there, get those vanilla beans, and have some fun in the kitchen! Happy baking!
Frequently Asked Questions
What is the best way to blend vanilla beans to make easy homemade paste?
The best way is to start by splitting your vanilla beans lengthwise and scraping out the seeds into a bowl. Then, combine these seeds with corn syrup, water, and optional glycerin in a saucepan. Heat gently until mixed, then blend until smooth in a blender or food processor, creating your "Blend Vanilla Beans: Easy Homemade Paste."
Can I use substitutes for corn syrup in the recipe?
Yes, you can substitute corn syrup with agave syrup or maple syrup for a different flavor profile. However, keep in mind that the sweetness and viscosity may vary slightly, affecting the final texture of your vanilla paste.
How do I store my vanilla paste to keep it fresh?
Store your homemade vanilla paste in a clean, airtight jar in a cool, dark place. If stored properly, it can last up to a year. Always label and date your container to keep track of freshness.
What are some variations I can try with my vanilla paste?
There are many fun variations you can try! For instance, you can add a tablespoon of cocoa powder for a chocolate vanilla paste, or a pinch of ground cinnamon or nutmeg for a spiced version. Experimenting with flavors can enhance your baking and desserts!
Is it necessary to use glycerin in this vanilla paste recipe?
No, using glycerin is optional. It helps achieve a smoother consistency, but you can skip it if you don’t have it. The paste will still turn out delicious, although its texture might be slightly thinner.
Can I use vanilla bean paste instead of whole beans in other recipes?
Absolutely! You can substitute vanilla bean paste for whole vanilla beans in most recipes. Generally, 1 teaspoon of vanilla bean paste equates to 1 whole bean, making it a convenient option when you want rich vanilla flavor without the fuss of handling whole beans.
Blend Vanilla Beans: Easy Homemade Vanilla Paste Card

⚖️ Ingredients:
- 6-8 vanilla beans (about 30-40g)
- 1 cup (240 ml) light corn syrup
- 1 cup (240 ml) water
- 2 tablespoons (30 ml) glycerin (optional, for consistency)
🥄 Instructions:
- Step 1: Use a sharp knife to split each vanilla bean lengthwise, scraping out the seeds into a bowl. Reserve the empty pods.
- Step 2: In a small saucepan, mix the vanilla seeds, empty pods, corn syrup, and water. Heat gently until combined, stirring frequently.
- Step 3: Pour the warm vanilla mixture into a blender or food processor. Blend on high until smooth.
- Step 4: If using glycerin, add it now and blend briefly until incorporated.
- Step 5: Transfer the vanilla paste into a clean jar or container. Allow to cool to room temperature before sealing.
Previous Recipe: My Family's Favorite Slow Cooker Chicken Sausage Hearty Stew Recipe
Next Recipe: My Favorite Roasted Vegetable Quinoa Salad with Creamy Tahini Dressing